See the transformation
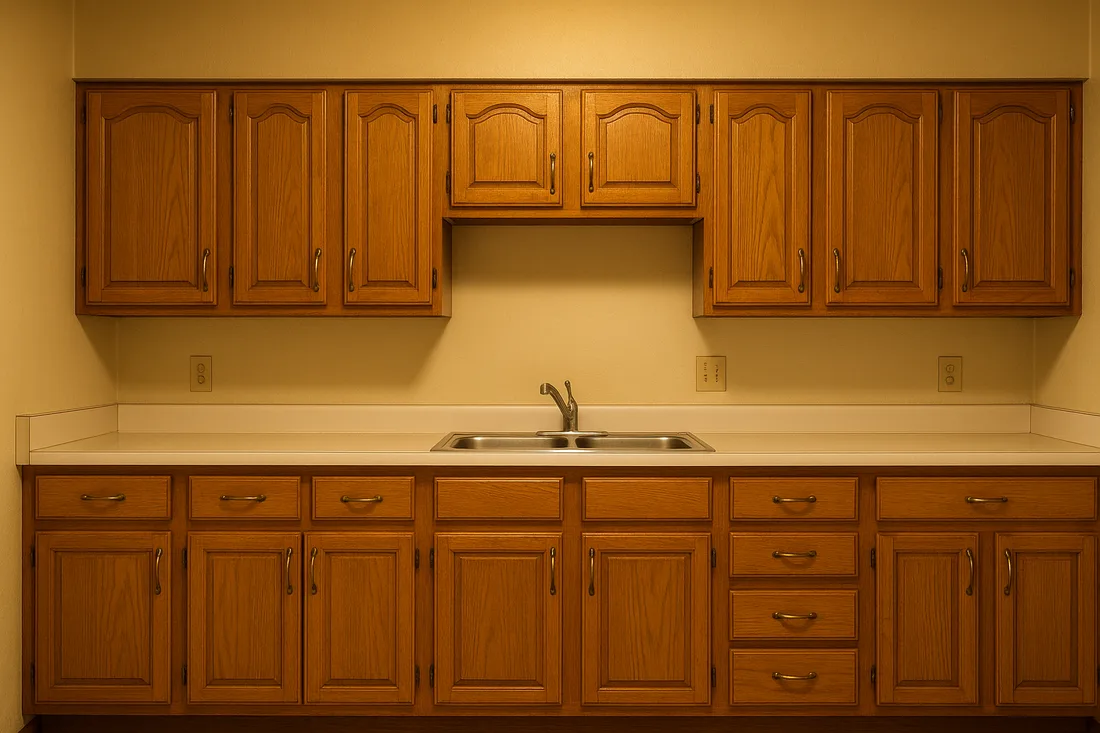
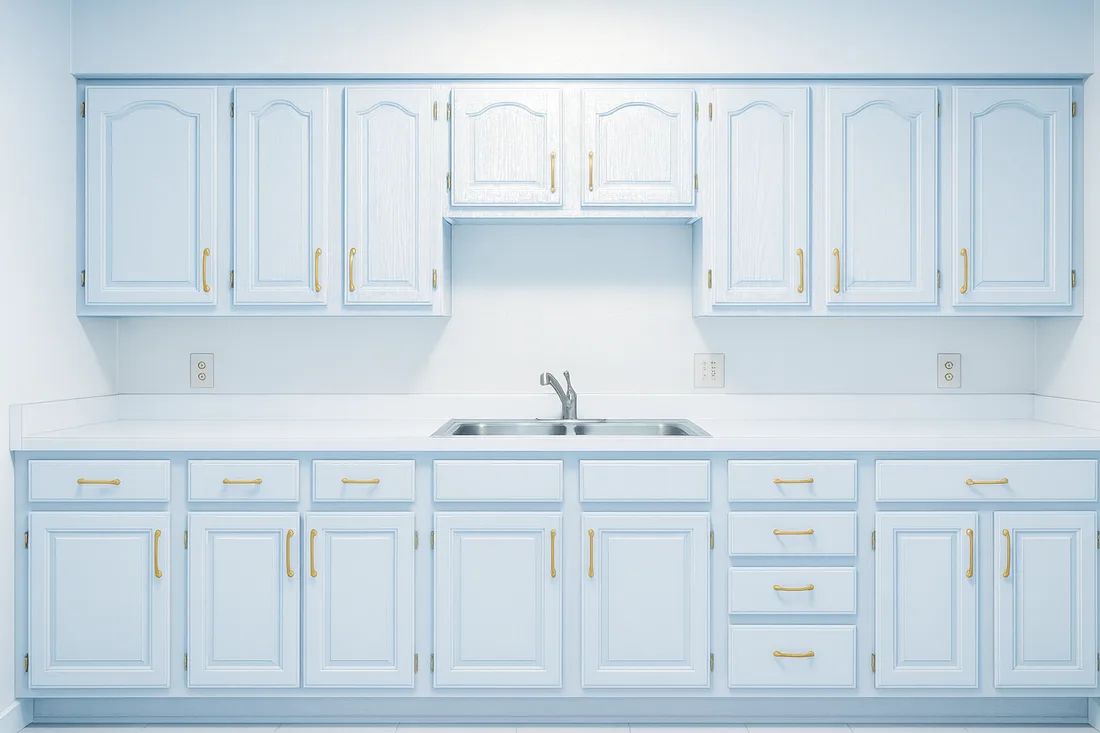
Golden oak to modern white with a light blue glaze
Same cabinet layout and hardware positions, refinished with a white base coat, a light blue glaze worked into the profiles, and a satin waterborne topcoat.
What "golden oak" actually is
If your kitchen or bathroom cabinets went in any time from the mid-1980s through the late 1990s, there's a good chance they're red oak under a clear or lightly amber varnish: heavy, open wood grain, an orange-honey tone that's only gotten warmer with age and UV exposure. I see this kitchen constantly across older subdivisions throughout the Niagara Region, from St. Catharines to Welland to Fort Erie; it was the standard builder-grade choice for two solid decades. The doors and boxes underneath are usually still perfectly solid. It's the colour and the shine that read as dated, not the wood itself, which is exactly why refinishing beats replacing in most of these kitchens.
A glaze is what gets you from "orange oak" to "intentional and modern" without an opaque paint job that hides the wood entirely. It's a thin, tinted coating applied over a base colour, then worked into the grain and profile lines and wiped back off the flat surfaces, so the recesses read darker and richer than the highlights. That contrast is what reads as depth and craftsmanship rather than a flat coat of paint.
The waterborne process, step by step
-
Clear the space and remove everything
Empty the cabinets, remove every door and drawer front, and take off all hardware. Number each door and its opening with painter's tape on the inside edge; you will not remember which door came from where once they're all stacked flat.
-
Degrease before you sand
Kitchen cabinets carry a film of cooking grease even when they look clean, and sanding over grease just grinds it deeper into the wood. Wash every surface with a degreasing cleaner made for pre-paint prep, rinse, and let it dry fully. This single step is the most common reason a cabinet refinish fails early.
-
Scuff-sand, don't strip
If the existing varnish is sound, a full strip to bare wood usually isn't necessary. A scuff sand with 220 to 320 grit dulls the old sheen and gives the new coating something to grip. Fill any dents, gouges, or old hardware holes now, and sand those flush. Vacuum and tack-cloth every surface before moving on; leftover dust telegraphs through every coat that follows.
-
Bonding primer
A waterborne bonding primer made for cabinetry is what lets a new finish grip an old varnish without stripping it. One even coat, fully dry, is usually enough. This is not the step to substitute a wall primer for.
-
Base colour
Apply your chosen base colour in two thin coats, sanding lightly between coats with a fine grit to knock down any raised grain or brush marks. Thin, even coats dry harder and look flatter than one heavy one.
-
Glaze
Apply the glaze over the fully cured base coat, working it into corners, profile lines, and grain with a brush, then wipe the flat areas back with a lint-free cloth so the recesses stay darker than the highlights. Work in small sections; glaze has a limited open time before it starts to set; and step back often to check that the contrast looks even across every door.
-
Topcoat
Once the glaze has cured per the product's stated time, apply two to three thin coats of a waterborne cabinet-grade topcoat, scuff-sanding lightly between coats. This layer is what actually protects the colour and glaze underneath from grease, water, and daily handling, so don't skip coats to save time.
-
Cure before you load it up
Waterborne finishes are dry to the touch in hours, but full cure, the point where the coating reaches its real hardness, takes one to three weeks depending on the product and your humidity. Rehang doors as soon as they're dry, but go easy on slamming doors or loading heavy items into drawers until that cure window has passed.
-
Reinstall hardware
With the doors off anyway, this is the cheapest moment to swap dated hardware for something that matches the new look. New pulls do as much for the "modern" read as the finish itself.
What to look for in products
The names on the can vary by manufacturer, but the qualities that matter don't. Whatever you choose, look for these:
- A bonding primer built for cabinetry, not a general wall or drywall primer. It should be formulated for adhesion over existing finishes and laminates.
- A cabinet-grade base coat, not wall paint. Look for language like "cabinet and trim" or "cabinetmaker" on the label; these are cross-linking formulas built to cure harder than interior wall paint.
- A glaze with enough open time to wipe back cleanly. Check the manufacturer's stated working time before you start, and do a test door first so you know how it behaves.
- A cabinet-rated waterborne topcoat, ideally described as a conversion or catalyzed formula, not a generic waterborne varnish or a floor finish repurposed for cabinets. This is the layer that has to shrug off grease and water every day.
- One matched system where possible. Primer, base, glaze, and topcoat from the same product line are formulated to bond to each other. Mixing brands between coats is where adhesion problems usually start.
- A satin or low sheen for the modern look you're after; it reads calmer than gloss and hides handling marks better over time.
Even waterborne needs basic precautions
Waterborne products are far lower in odour and solvent content than what they replaced, but they're not risk-free. Ventilate the room while you work, wear nitrile gloves and eye protection when handling primer, glaze, and topcoat, and wear a proper dust mask or respirator rated for fine particulate while sanding. None of this requires special equipment, but skipping it isn't worth the shortcut.
Why the strongest finishes are professional-only
Solvent-borne conversion varnish and pre-catalyzed lacquer are the finishes that hold up hardest and longest in a kitchen that actually gets used: harder film, better chemical and heat resistance, the kind of durability a waterborne product can approach but not quite match. That performance comes from solvent-based chemistry that is flammable and high in VOCs, and it has to be spray-applied in a space with real ventilation, explosion-proof electrical fixtures, and a cartridge respirator rather than a paper dust mask. That is not a home-kitchen setup, and it's exactly why this stage of the work is priced and handled as controlled professional work rather than a weekend project.
What it costs to have a professional do it
If you'd rather hand the whole job to someone who works in these finishes daily, professional cabinet refinishing in Ontario runs roughly as follows, scaling with kitchen size and the finish system used:
| Kitchen size | Approx. doors & drawers | Cost range |
|---|---|---|
| Small | 15–18 pieces | $3,000–$4,500 CAD |
| Medium | 20–25 pieces | $4,500–$6,500 CAD |
| Large | 28–35 pieces | $6,500–$8,500 CAD |
Some shops price per door instead, starting around $130 CAD per piece for a fully spray-finished door or drawer front. Jobs using solvent-borne conversion varnish tend to land at the higher end of these ranges, since they require spray booth time and the ventilation and safety setup described above, on top of premium material cost.
Pricing based on 2026 Ontario market data from Blackwood Kitchens and Cabinet Reset. Get quotes from a couple of local shops for your specific kitchen; condition, door style, and box repairs all move the number.
Got a piece of solid wood furniture rather than built-in cabinets? That's exactly what Wood Rescuer takes on. See the full list of refinishing services, or email me a piece to donate.